Showing posts with label snacks. Show all posts

Friday, August 24, 2012

Oreo Apples

Sister and I have used these Oreo molds a few times and, in spite of my best intentions, I’ve yet to share the details.  I managed to take pictures of the steps most of the way through making the Oreo Apples for our First Place First Grader party and first day of first grade lunch.
August 2012 478 copy

First, you’ll need to get your Oreo molds.  I searched high and low at places like Michael’s and Hobby Lobby to no avail, and ended up buying them online from Spinning Leaf.  A six cavity mold is $6 and I bought two.

In addition to the mold, you’ll need chocolate candy melts (red and green if you are making apples), Oreos and a disposable pastry bag (mine are plastic by Wilton and were purchased at Michael’s.)  [The fact that Honey bought reduced fat Oreo's makes me laugh a little.  And the fact that he went to the grocery store at all makes me laugh a lot...I envision him strolling the aisles (for probably the third time in his life) trying to figure out where on earth they hide the Oreo's.  He's a good man, that Honey.]

photo (73)

1. Put your pastry bag in a microwaveable cup and add about half the bag of chocolate.  Melt according to the package directions.
photo (74)

2. Once melted, snip the tip off the pastry bag with scissors.  Put a generous amount of chocolate in each cavity of the mold.  You want to have enough chocolate in them so that when you press your Oreo down it will come up the sides of the mold a good ways.
photo (75)

3.  Gently press an Oreo in each cavity.
photo (72)

4.  Pipe more chocolate on top of the Oreo’s.
photo (76)

5.  Tap the mold down on the counter to encourage the chocolate to fill down the sides of the mold and completely cover the cookies.  You might need to add more chocolate on top as you work it down the sides.
photo (77)

6.  Level out the tops with a knife and use a damp paper towel to clean up the top of the mold.  Put the mold in the fridge to set.

[Here’s where real life set in and I just had to get it done rather than stop to take pics every two mintues.]

7. Unmold the Oreo’s by gently pressing on the tops and sides to release.  This should be fairly easy.

8. To make the stems, melt your green chocolate in a new pastry bag using the same method you used for the red.  Lay a piece of waxed paper on a plate and pipe out a stem/leaf shape for each apple.  Put the plate in the fridge to set.  It should only take a minute or two.  Once set, use a blob of green chocolate on the cookie to adhere the stem/leaf.  I had to prop it up on the side of my cutting board until it set.

So that’s it.  Sorry I flaked half way through. I realize I’m not great at explaining things… probably because I’m generally making them up as I go.

Happy back to school, y’all!
xoxo

Flattered for the feature at Frugal Girls!

Tuesday, August 14, 2012

Good Luck Smartie Pants {Free Printable}

The PCP trotted off to his first day in first grade with this sweet sentiment tucked into his lunch box…
August 2012 460 copy
It’s a reprise of the same treat he found in his box on the first day of Kindergarten.  He asked me for smarties in his lunch at least one hundred more times throughout the one hundred eighty day school year, so I figure the first day of first grade is a good one to indulge. :-)
August 2011 114

Last year we used the same labels to package up little treats for his neighborhood friends.
August 2011 117
And, after a few requests over the last year, I finally have a file for y’all to download and make your own treats!  There is a page for kindergarten, a page for first grade and a catch-all page that says “good luck in school!”  I printed mine on full page label paper, cut out circles and stuck them on colorful scrap book paper (purchased last year at Michael’s).  My Dollar Tree sells Smarties by the bag which makes for a pretty cheap treat!
Good Luck Smartie Pants
Go to town, y’all!
xoxo

Saturday, April 28, 2012

Baseball Snack

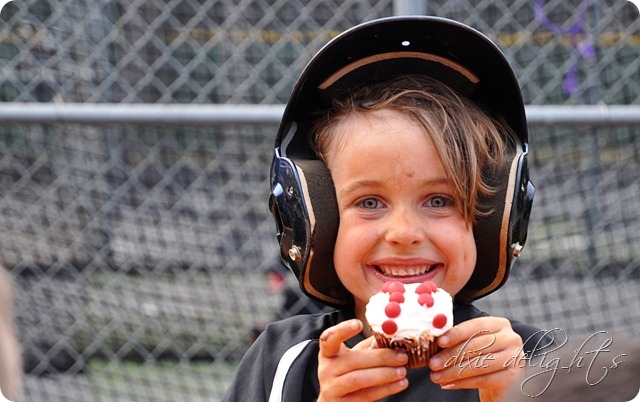
Last night brought the game that is always my very favorite of the season…my snack night!!  This is the PCP’s fifth season and I invariably spend every game leading up to mine cooking up ideas.  I’ve done Cracker Jack cupcakes, Cracker Jack bags, Baseball Pies, Baseball Doughnuts and now the Baseball Glove cupcake cake!!  Some little stinker obvi stole one red m&m when I wasn’t looking :-)
April 2012 884 cop2y
This was super easy to pull off and inspired by something I came across on google images.  Bake a box of cupcakes and be sure to get all two dozen out of the batch.  Lay them out in this arrangement on a your serving piece (this lovely thing is actually our checker board wrapped in foil and then a piece of plastic disposable tablecloth) before icing.  Once in place, ice twenty-three cupcakes in chocolate and the last one in white.  I stuck red m&m’s in the icing to make the laces on the baseball cupcake.  It was Honey’s fab idea to draw the glove’s webbing on the cake plate/checker board.  If he’d had this genius idea before the very minute we were walking out the door, I would have piped them on with chocolate icing.  Alas, I am sure we have many, many more seasons of baseball ahead of us between the two littles.

Speaking of cupcake cakes, I must admit that this one turned out immensely better than my last attempt at a cupcake cake…do not try this at home, ladies. 
iphone 046
Neeedless to say, my “bat” cake didn’t make it to the pee wee ball game. *bwahahahahaha*  Though, it undoubtedly would have served me well at the one gazillion bachelorette parties I was attending a decade ago.
But I digress…the rest of the snack shaped up like so…
April 2012 896 copy
The boys noshed on ball field hot dogs, orange slices with an Orioles baseball pick, and baby carrots with ranch dressing.  I got so into picking out orange food and drink that I had to force myself to step away from the cheese poofs (or so we call them around these parts.)
April 2012 887 copy
And because I’m a glutton for punishment (and because WalMart seemed to have a plethora of orange food, drink and party ware), I painted a party favor cup for each little ball player and filled them with Cracker Jacks.  The cups came in a rainbow of colors and were just $1 (or was it $2?) for a set of six.  In fact, everything you see here came from my super WalMart – table cloth, plates, cups, napkins, food and drinks!
April 2012 888 cop2y
I also managed to snap what is probably my favorite picture ever from five baseball seasons combined.  Daddy and son bumping fists after a great hit and run to third base.
April 2012 890 cop2y
No, the PCP did not get hold of some really bad orange-ish self tanning lotion.  What he did do is roll around in the dirt like an old fat sow (anyone else familiar with Bugs Bunny’s Hillbilly Square Dance??)  in an obvious effort to challenge my laundry prowess.  Honey called the maneuver that resulted in this look “a face down snow dirt angel.”
April 2012 900 copy2
April 2012 899 copy2
And no, the baby does not play ball.  Yet.  But he does gear up in the PCP’s old threads just in case he gets called up.
April 2012 883 cop2y
Just as soon as the PCP laid eye on the “special baseball cupcake” in the middle of the glove, he made it his mission in life to make it his own.  His team had barely given the last “good game” clasp when he bolted off the field (faster than he’s ever run on the field, mind you) to snatch it off the plate and take a huge territorial bite right out of the top.  This, my friends, is the (exceedingly orange) face of victory…he got the cupcake and they won the game to boot.
April 2012 903 copy
Happy weekend, y’all!  We’ll be back at the field again tonight!
xoxo

Flattered for the features at DIY by Design and Tip Junkie!

Releated Post