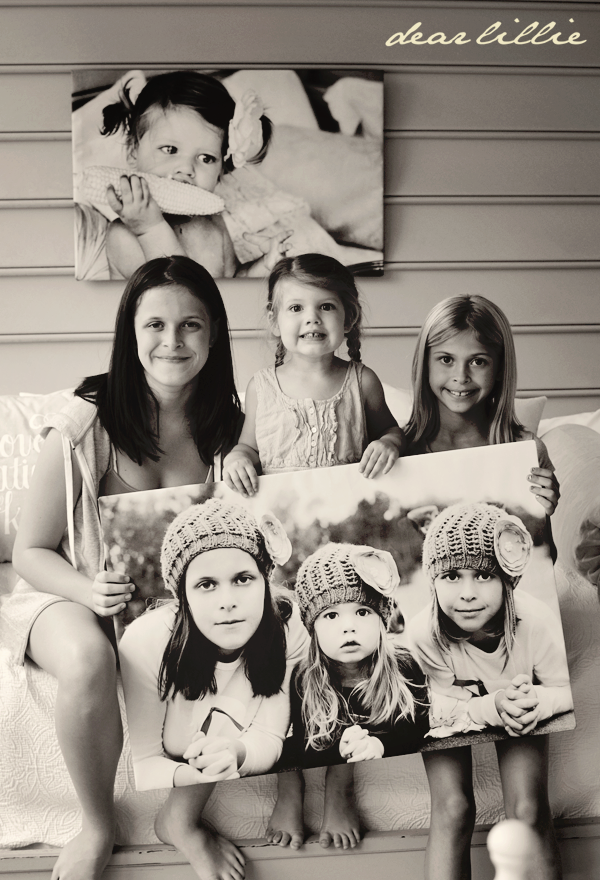
Yesterday I showed you some poster sized prints I added to our porch for a bit of a modern punch. Today I will show you how I made them. This is the single easiest tutorial I think I could ever possibly write. Seriously! In fact, I am not sure it really even qualifies as a "tutorial". The whole project only requires three items and can be done in less than 5 minutes. And it should cost you less than $10. I think mine cost right around $7 each. The only special talent you need to have for this project - being able to fold a piece of paper and press a piece of tape down! Yup - that's it! For the tutorial I am about to show you Lillie and our nine year old neighbor, Chloe did it themselves while I took the photos.
I have to say I have LOVED this project and had so much fun with it that we've already made five different ones (three for the porch - one we switched out, one for Lillie's room, and this one for Chloe and Bayley). That being said these don't really replace a true canvas. They are great for places like porches, playrooms, kids bedrooms, etc. but personally I probably wouldn't put them in our living room as I think they look a little too "papery" up close. So, if you are looking for the higher end look of canvas I wouldn't try this. As long as you are okay with a fun project that still looks crisp and clean then I think you will like this! I have seen quite a few tutorials on pinterest for a similar look, including this fabulous one from
Sugar Bee Crafts that use spray adhesive and mod podge, and house insulation. I think if you can do that right they probably have a slightly more high-end finished look to them but I tried three times to make some using those instructions and just ended up with a wrinkly mess. Not sure if I just rushed through the project too much or if I can blame it on the fact that my helper is three. =) And I couldn't for the life of me get the house insulation to cut in a perfectly straight line - oh well! Either way I wanted the same oversized look but needed it to be easier and here is what I came up with.
Okay, so here is what you need:
Any Kind of Tape
20" by 30" Piece of White Foamboard ($4.49 at our Staples)
24" by 36" Engineering Print from an Office Supply Store ($2.99)
(I used Staples and just uploaded my picture online and then picked it up a few hours later.)
UPDATE: We've had a few people comment that on the Staples website it says the engineering prints are not suitable for photos. It does say that but I just ignored it. I have been completely happy with all but one of the prints. I used high resolution photos for all but one and they were very crisp and sharp. The one that turned out blurry (still usable but just not as crisp as the others) was not as good a quality shot to begin with and that is why it didn't print as well. So, just make sure you are using a high resolution photo and it should be fine!
This is the foamboard I used. The 20 by 30 size worked perfectly for me but you could easily trim it down.
Now, just lay your print face down and then place the foamboard down on top of it in the center. Fold up one long side and tape it in the middle and then pull it as tightly as possible on the other side and tape it. If you would like you could use double stick tape on a few spots on the front to hold it perfectly tight and flat but I didn't bother with that. Then after you fold the long two sides over fold the other two sides and tape them in the middle.
Then just fold the corners like this and add more tape. Basically it's like you are wrapping a present.
You can just lean it up on a dresser or something like that but if you want to hang it just use any type of string, twine, yarn, etc. and hotglue it on the back. The poster is so lightweight that's all you need!
And there you have it! Now just hang it up on a little nail or one of those 3M Command strips.
(That's what they are hung on out here on our porch).
I told you it was easy!
I have considered adding some mod podge on the top of it but am a little scared too...we'll see. If I do I will update this post and let you all know how it turned out.
Here are the girls with the finished product! Lillie and Chloe did this one themselves while Bayley was super sweet and played with Lola while I took the step by step pictures.
In between the tutorial shots I got this one of Lola playing peak-a-boo with Bayley on the daybed.

If you would like to view more of our tutorials just click
here.
I hope you all have a fabulous Tuesday!